Create a class
This fourth step will teach you how to set up the class details so that your customers know what to expect, whether prior experience or expertise is required to take the class, and whether any equipment is required to participate. Don't worry, the process is simple; you just have to follow the instructions below.
Source: @Rezervofficial
Create class category and a class
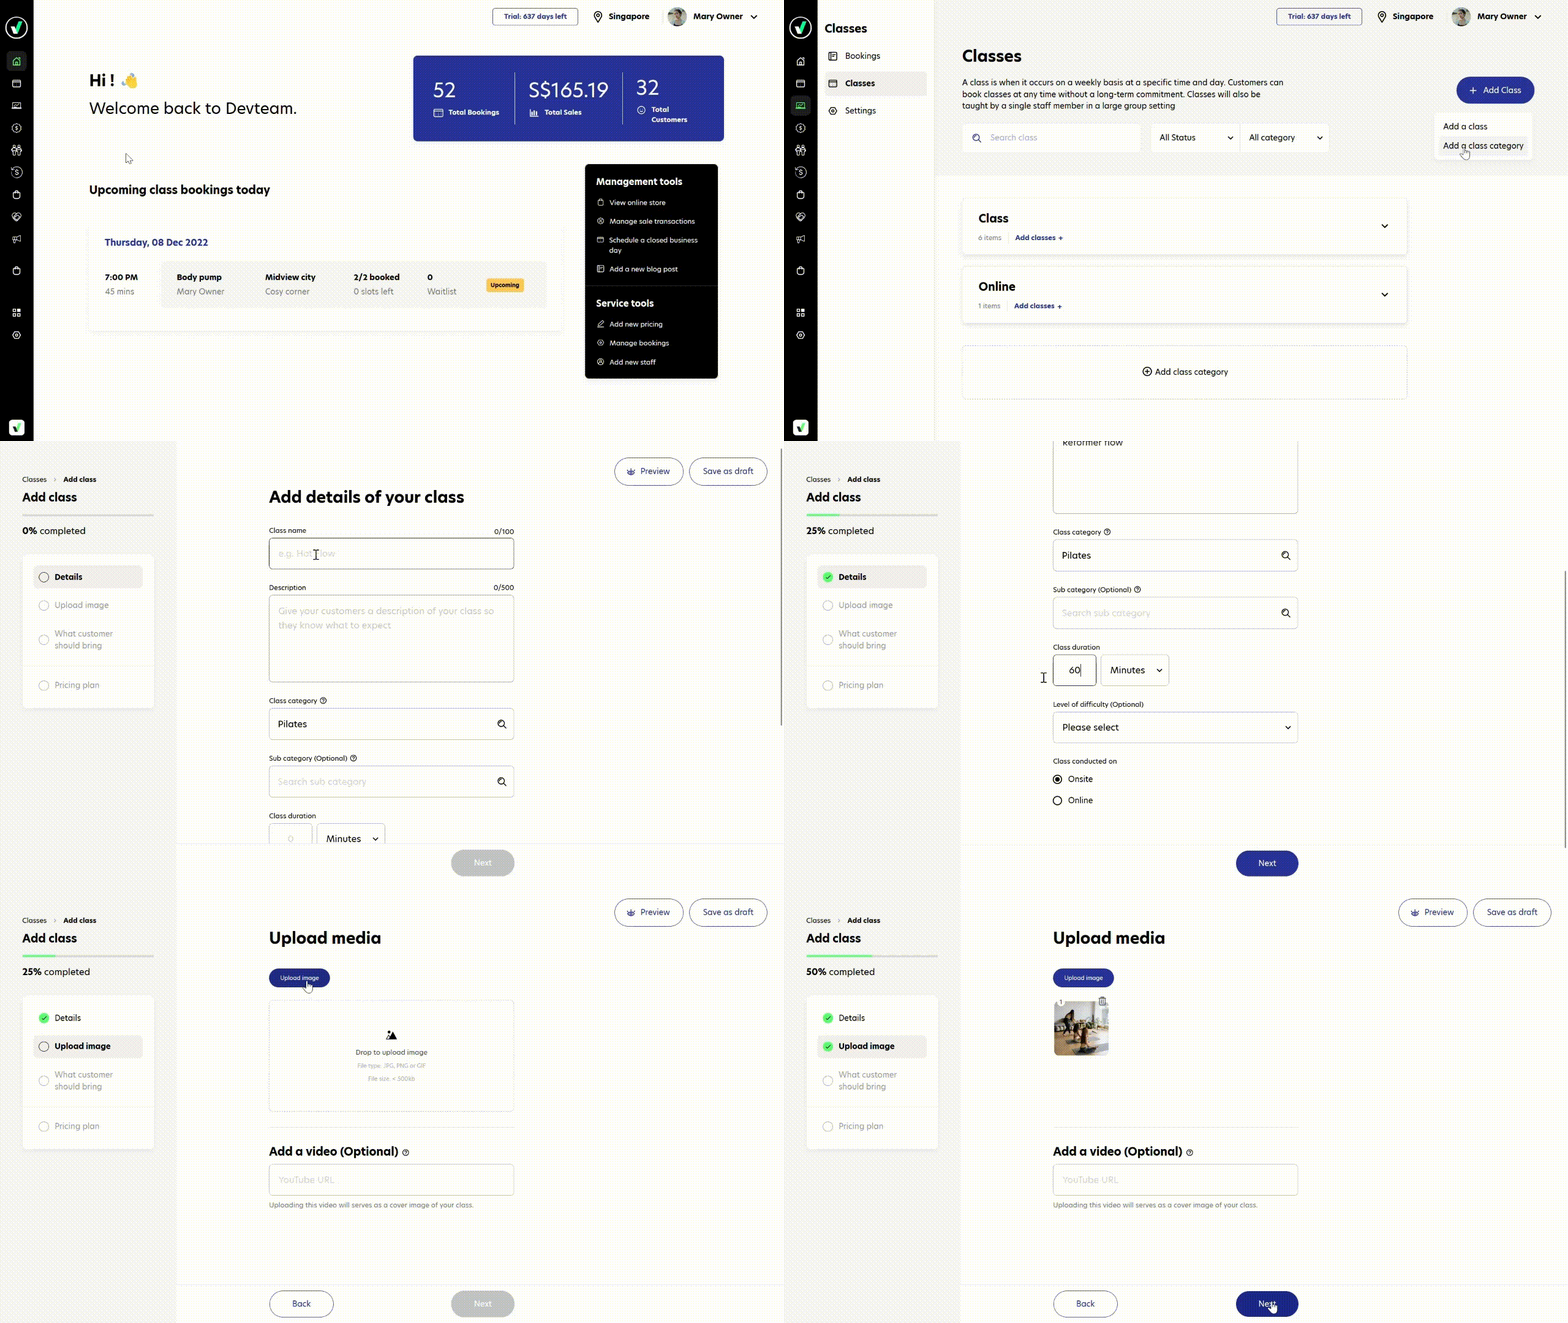
1. From the dashboard, go to the ‘Class’ menu.
2. Then go to the ‘Classes’ tab.
3. Click the ‘Add class category’ button.
4. Type in the name of your class category.
You can categorise your class category by its number of participants, or you can also categorise it by the type of exercise you provide.
Example: ‘Private Class’ and ‘Group Class’ or ‘Pilates Class’ and ‘Yoga Class’
5. After that, Click the ‘+ Add classes’ text button. Then you'll move to a new page called the ‘Add Class’ page.
6. In the ‘Details’ section you have to fill in the details of your class info such as name, description, duration, difficulty level, and whether the class is conducted onsite or online.
7. After you’ve done, click the ‘Next’ button.
8. In the ‘Upload Image’ section you have to upload an image that best represents your class, or you can also add a video.
The image file size limit is 500 Kb. If your image file size is bigger than that, then make sure you compress the image before uploading it.

Set what required by customers
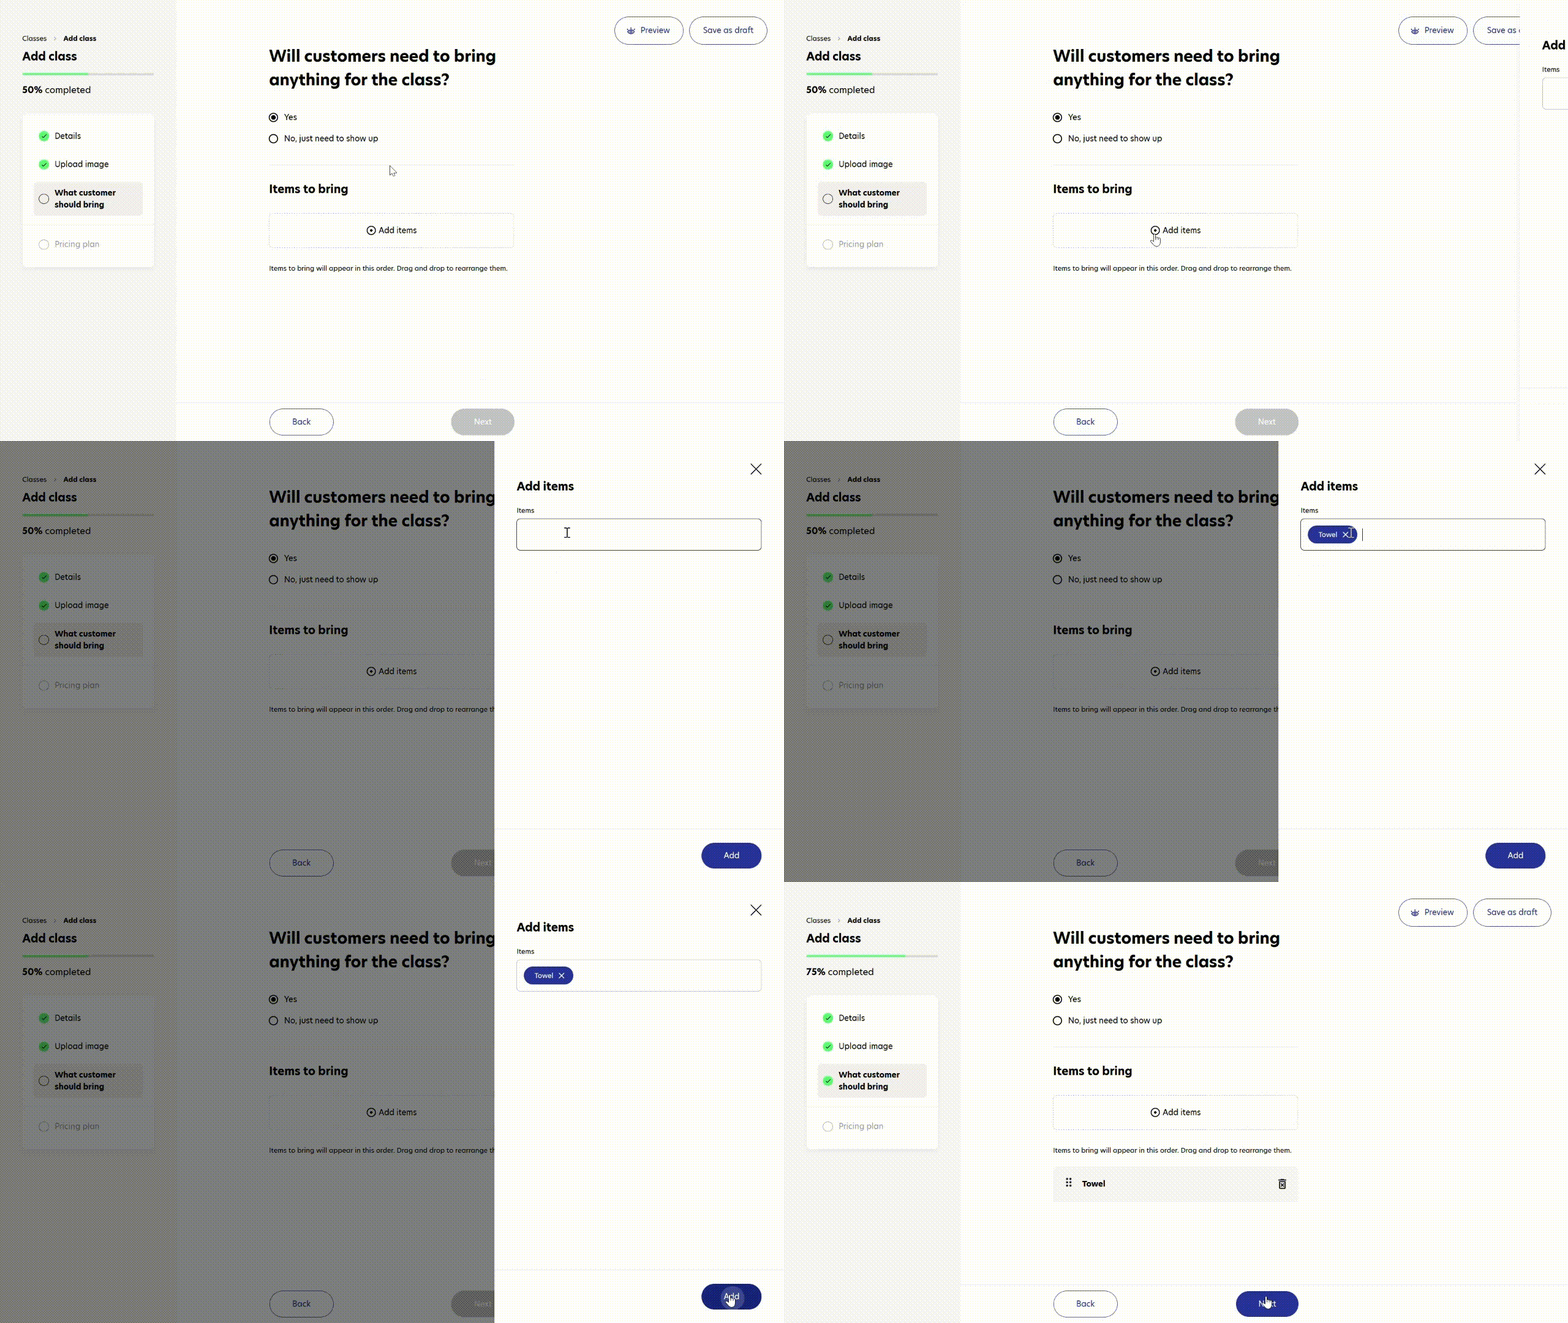
1. After you’ve done, click the ‘Next’ button.
2. In the ‘What customer should bring’ section you have to select whether your customers need to bring anything for the class.
- If you select ‘No, just need to show up’ you can just skip to step number 3.
- If you select ‘Yes,’ then click the ‘Add items’ button, then fill in all the required items that your customer needs to bring and click the ‘Add’ button.
3. After you’ve done, click the ‘Next’ button.

Assign packages (pricing plan)
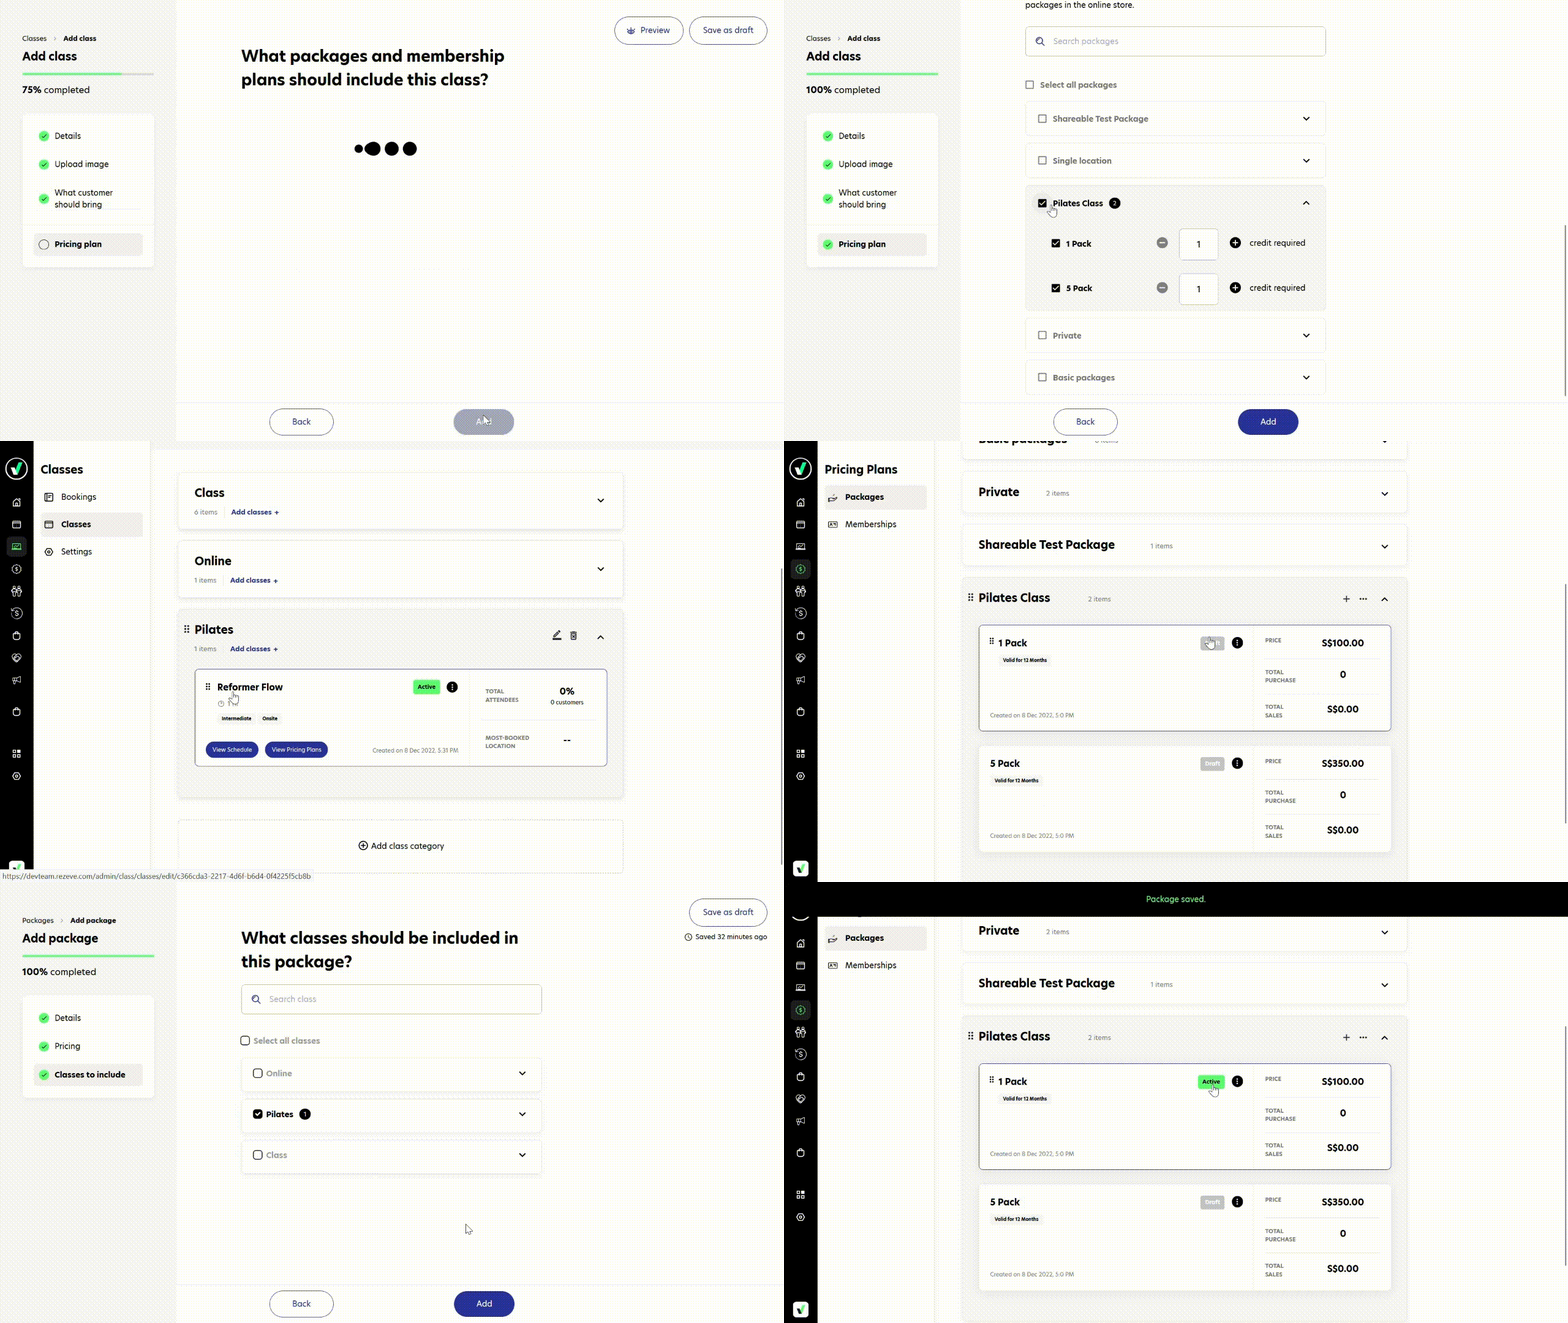
1. In the ‘Pricing Plan’ section, you have to assign the packages with the corresponding classes.
Remember the 'Class to Include' section in the Step 3: How to Create Pricing Plan for Your Class that we skipped before? Now you don't need to manually add it since it's already automatically assigned to the selected class!
2. After you have finished and are satisfied with all of the information of the class that you have added, click the 'Done' button.
3. Don’t forget you still save your ‘Package’ as a draft before, so to activate it you need to follow these step:
- From the dashboard, go to the ‘Pricing Plans’ menu.
- Then go to the ‘Packages’ tab.
- Click the ‘Category’ that you already created before.
- Click the ‘Package’ that you saved as draft before.
Then click the big blue ‘Add’ button on the bottom right.

